Tools Required:
Fine Sandpaper
Pliers (Round Nosed)
Wire cutters |
Additional items required:
Sealer
Paint
5 minute Epoxy |
| Step #1 |
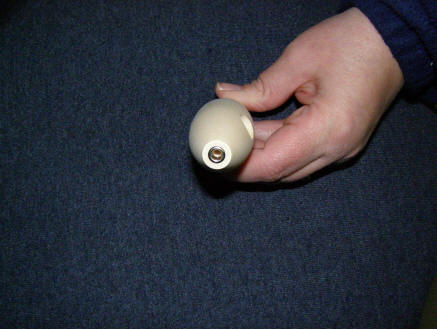
Using 5 minute epoxy apply to the belly weight and install into hole on bottom of lure-use hole that is not recessed. Leave lure upside down until dry. Optionally fill belly hole with wood putty after weight is glued in and sand flush if necessary. Through-hole may need to be redrilled with a minimum 5/32" extended length drill bit and a battery drill after the glue is dry on the belly weight. This is not needed on some kits. Use caution! |
|
| Step #2 |
If necessary, lightly sand lure with fine grit sandpaper to a maximum of 220 grit. |
 |
| Step #3 |
It is highly recommended you seal the lure against water penetration to prevent the lure from splitting if it absorbs water. This can be done with simple Shellac or a 60/40 mix of boiled linseed oil and mineral spirits, Waterlox or any tung oil coating, or multiple dips in a lacquer sanding sealer. Observe caution and proper disposal of any rags used. Allow to dry fully before proceeding further. This is absolutely critical. |
|
| Step #4 |
Prime and paint lure, several options exist-AC Moore has Cracker Barrel latex paints available inexpensively and these can be used with a small brush. This is a good choice if the lures are to be made by children. Alternately the lure can be be painted with spray paint available from any hardware store, Salty's also sells a line of paint available on the plug hardware page. Bin primer is a good choice to prep the lure for paint. Follow all precautions with use of these items. |
|
| Step #5 |
After the lure is painted we recommend you spray with a minimum of two coats of Clear spray paint or brush with epoxy such as our Bob Smith Epoxy to protect the paint from rocks and sharp fish teeth. Allow to dry fully before handling. More information can be found on our lure forum. |
|
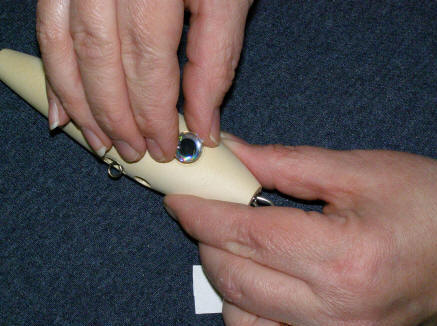
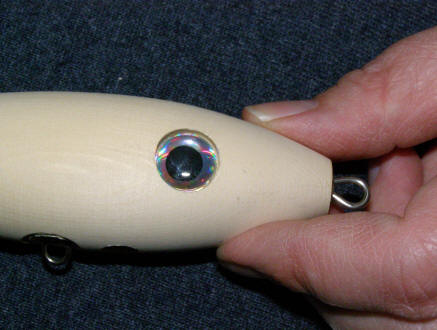
| Step #6 |
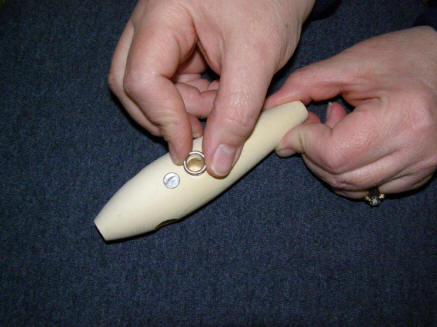
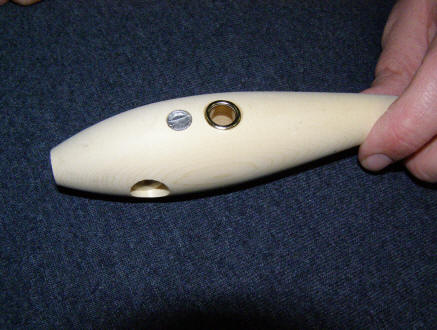
Using 5 minute epoxy, glue belly grommet into recessed hole in bottom of lure. Glue eyes in also at this time. Allow to dry fully before handling. |
|
| Step #7 |
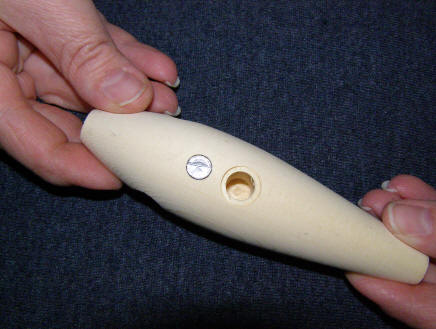
Insert small 3/16" nose grommet into the front of the lure. This does not get glued in place. |
 |
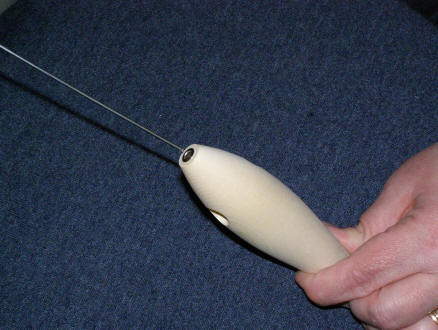
| Step #8 |
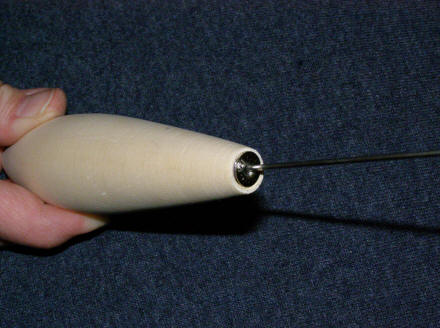
Insert through wire into front of lure through the nose grommet until you see the wire just inside the belly hook hole. If hole doesn't appear to connect very slightly bend the last 1/2" of the wire so you can re-insert and twist the wire while pushing it will find the correct hole to get through. Sometimes holes are just enough to get a wire through or are offset slightly due to wood grain. |
 |
| Step #9 |
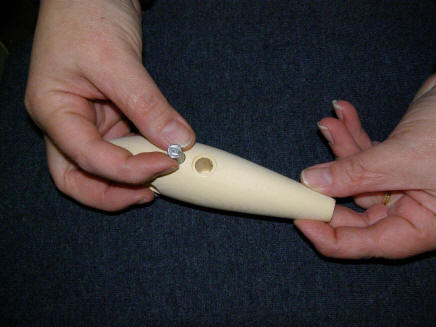
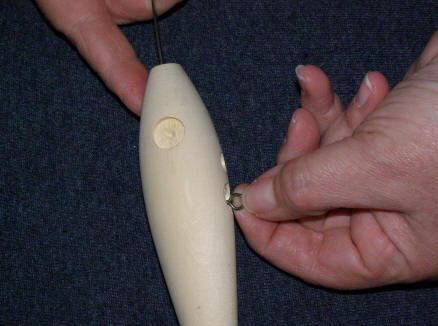
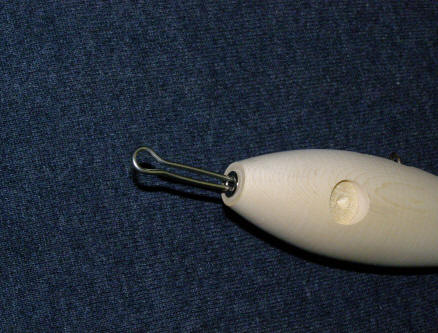
Take Crane swivel and insert into the belly hole while pushing the wire through the through-hole. The idea is to captivate the wire through the open end of the swivel inside the lure so just the bottom loop of the swivel is accessible on the bottom of the lure. |
 |
| Step #10 |
Push the wire all the way into the front of the lure so that the tag end of the wire is inside the nose grommet. The wire will extend out the back of the lure. Line up the nose loop up and down on the lure. |
 |
| Step #11 |
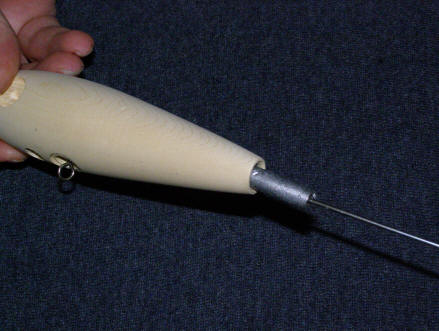
Install Large tail weight over the wire and insert into the rear of the lure. |
 |
| Step #12 |
Insert the post style tail grommet over the wire and insert into the rear of the previously installed weight. |
 |
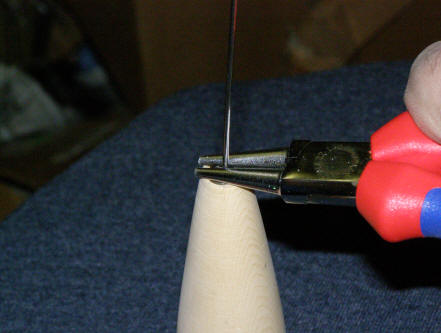
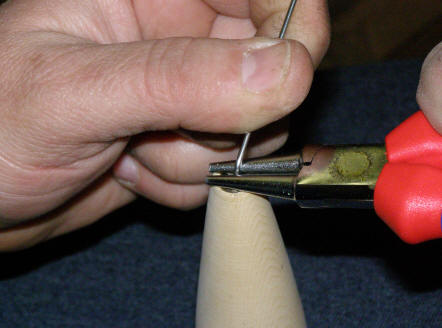
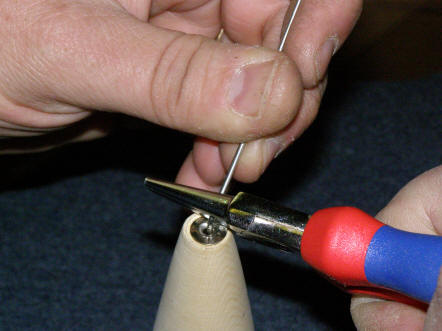
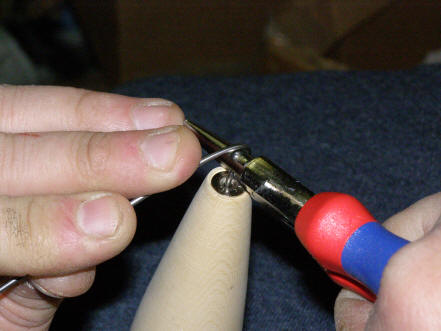
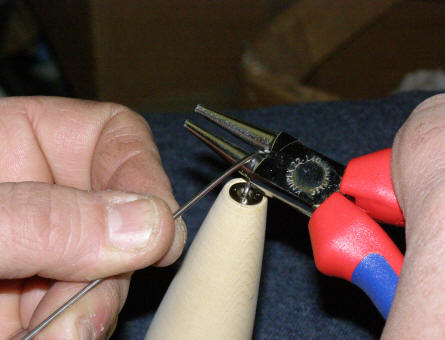
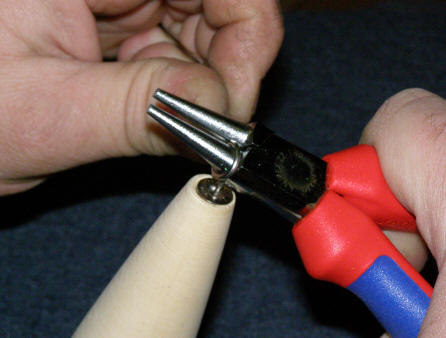
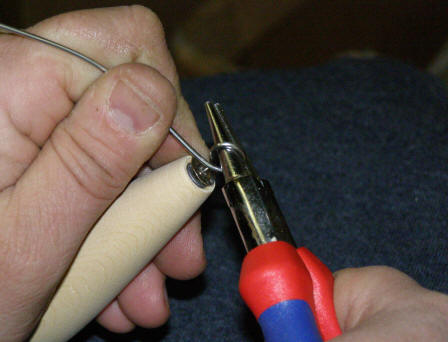
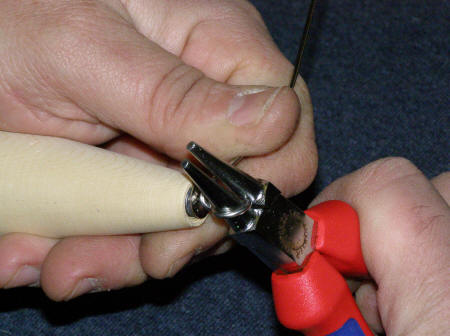
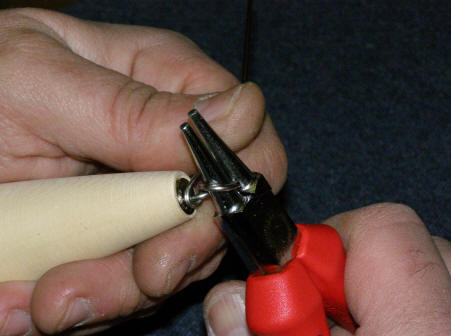
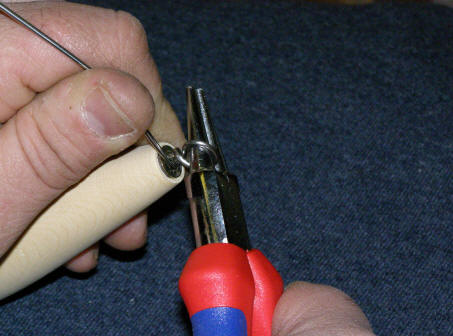
| Step #13 |
Wrap the wire into a loop on a pair of round nose pliers, or use a nail in a vise to bend the wire into a loop. Then wrap the wire around itself to tighten the through wire and "pre-stress" the wire inside the lure. I have a video on Youtube on how to do this. |

|
| Step #14 |
Install Treble belly and tail hooks using split rings
(Split rings and hooks not included in kit, more on lure hardware page) |
|
| These instructions detail very basic assembly/finishing techniques for this lure, more information and lure finishing tips can be found on our free lure forum. |